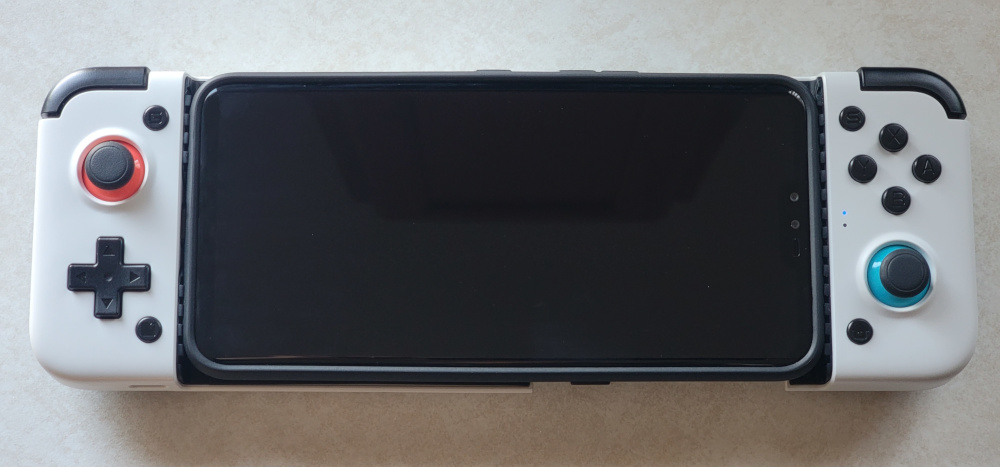
QHD Retro Heaven
Retro handhelds are a popular trend lately. A vast array of $50-150 Chinese handhelds now exist to fill this market. Some of these, like RG351V and Retroid Pocket 2, are excellent devices for their purpose, but none of them provide enough power to run later console generations or use latency-reducing features like Run-Ahead in RetroArch. Knowing this, and me being the image quality freak that I am, I’m looking to build the best quality-to-price ratio 1440p retro handheld (as of April 2021).
Quality and Quantity
The obvious choice of device is an Android phone, but not just any device will do! I have some specific requirements that need to be met:
- QHD/1440p resolution screen for optimal integer scaling with minimal letterboxing (black bars)
- Expandable storage via MicroSD slot
- CPU/GPU capable of max 1440p upscaling of the following systems:
- Popular consoles up to the 5th generation of home consoles, primarily: NES, SNES, Genesis/Sega CD, TurboGrafx 16/CD, Sony PlayStation, N64, Sega Saturn
- Popular handhelds up to the 7th generation of handheld consoles, primarily: Neo Geo Pocket Color, Game Gear, Game Boy, Game Boy Advanced, Nintendo DS, PSP
- Sega Dreamcast
- Nintendo 3DS
- Playable speeds at 1x-2x scaling for well-supported GameCube and Wii games
- Max resolution and 60fps for Android ports of games like Dead Cells, Castlevania: SOTN, etc.
- A dedicated physical controller
Acquiring a brand new device should avoid any worries regarding battery life, screen degradation, prior repairs, etc. The 1440p screen is an absolute requirement given the results of the Retro Console Emulation and Integer Scaling analysis I did. I’m also not targeting GameCube/Wii too heavily here, since the current hardware requirements for ultra high quality would blow up any budget we might set.
Some nice to haves would be:
- “Dockable” - easy to connect to an external TV or monitor via direct or dock/cradle
- No in-screen camera (notch, punch) module
- Flat back (no/minimal camera bump) for best controller compatibility
- Front facing biometrics (fingerprint, camera unlock, DNA scan, etc.) if you want to secure the device
- Headphone jack - for standalone media consumption
While those extras would be great, they can all be worked around or aren’t essential features.
What to Get?
After doing some research and performance testing on various Snapdragon devices (855, 855+, 888), I concluded a Snapdragon 855 CPU with the Adreno 640 GPU will meet the requirements and provide outstanding price-to-performance for this build. There might be a few edge cases of games needing some tweaking for full speed, but those will be rare occurrences.
If you already have a Snapdragon 855 or higher device, great! You’re all set and can skip this part. If not, there are quite a few devices with the required specs, but these seem to be the most appealing/affordable options for new devices I’ve found:
| LG G8 | LG V50 | Samsung Galaxy S10 | Samsung Galaxy S10+ | |
|---|---|---|---|---|
| Model | LM-G820 | LM-V450 | SM-G973U | SM-G975U |
| RAM | 6 GB | 6 GB | 8 GB | 8 GB |
| Internal storage | 128 GB | 128 GB | 128 GB | 128 GB |
| MicroSD slot | Yes | Yes | Yes | Yes |
| Screen | 6.1” 1440x3120px | 6.4” 1440x3120px | 6.1” 1440x3040px | 6.4” 1440x3040px |
| Battery | 3500 mAh | 4000 mAh | 3400mAh | 4100 mAh |
| Dimensions | 151.9 x 71.8 x 8.4mm | 159.2 x 76.1 x 8.3mm | 149.9 x 70.4 x 7.8mm | 157.6 x 74.1 x 7.8mm |
| New, Unlocked (eBay 4/12/21) | $268 | $300 | $440 | $489 |
These were the best deals I could find over the last few days, but you may be able to find them cheaper elsewhere. We basically have “standard” (6.1” screen) and “XL” (6.4” screen and bigger battery) versions from each manufacturer. The major differences between the LG and Samsung phones are 2GB of RAM…and over $150. You’re going to get an awesome device with an amazing screen no matter which of these you pick, though I know some people will prefer one manufacturer over the other no matter the price. Since I’m trying to get the most value out of the device, the LG phones seem the logical choice.
Another huge benefit in my opinion is that LG doesn’t gimp their phones out of the box. What I mean is that Samsung seems to default their graphics drivers to rendering 1080p internally, then upscaling it to 1440p, even when your device resolution is set to QHD mode. In order to adjust this, you have to download two different applications from their store to customize the graphics driver settings, PER GAME. You can apply to all games, but I’ve found it inconsistent with applying the settings to newly installed games, so I constantly check to make sure they’re set properly. This is the case with my S21 Ultra, so I hope it’s not the case on the S10/S10+. On the other hand, LG provides these graphics options directly via an extension in system settings, and also defaults to maximum quality/performance so you won’t even have to bother with it.
I’ve been testing out an LG G8 for a few weeks now, and I have to say it has thoroughly exceeded my expectations. The screen has very vibrant yet natural looking colors, and LG provides quite a few options for tweaking that color just how you like it. Battery life has been great with the screen between 50-75% brightness, getting 3-4+ hours of upscaled PSP play before needing to recharge. I’ve also tested an LG V50 for a few days and the experience was exactly the same, just with a larger screen. For the current going price, I don’t think you’ll find a better deal on new Snapdragon 855 devices.
SUGGESTED DEVICE: LG V50 or LG G8 (eBay Links)
Taking Control of the Situation
We have our device picked out, but how will we control it?
There are a plethora of control options available to us, with the main three being touchscreen controls, phone clip + controller (Xbox, 8BitDo, etc.), or a telescopic mobile controller. With the overarching theme of quality for this build, we’re going to target physical controls with a USB-C connection for the lowest input latency.

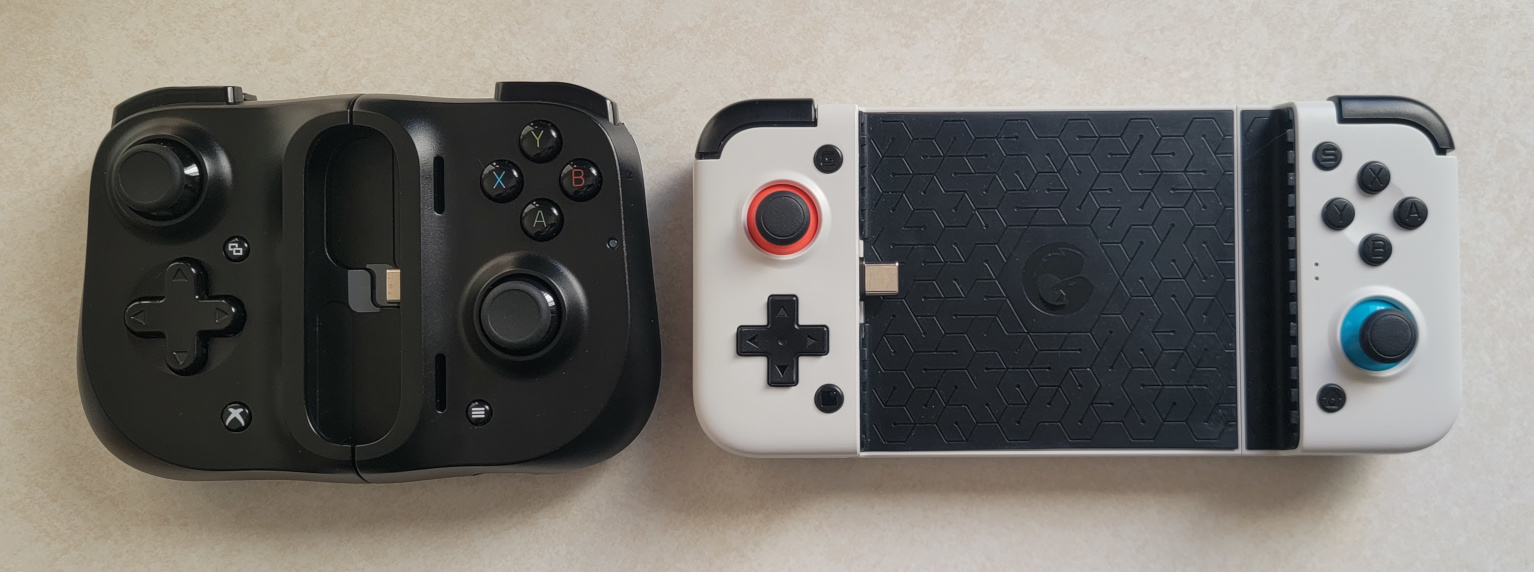
Razer Kishi (left) and GameSir X2 2021 Version (right)
The two most popular options right now are the Razer Kishi and the GameSir X2. They are both telescopic USB-C controllers that provide a squished Switch-like (Squitch?) form factor, with these notable differences between them:
| Razer Kishi | GameSir X2 | |
|---|---|---|
| Amazon Links/Price (4/12/2021) |
$80 (Android/iOS version) $100 (Android Xbox branded) |
$70 (2021/D-pad version) $60 (original, no D-pad) |
| Button Layout | Xbox | Switch |
| Button Type | Membrane | Tactile Metal Dome (D-pad, face buttons) Tactile Switches (L1, L2, R1, R2) |
| Analog Triggers | Yes | No |
| USB-C Connector Side | Right | Left |
| Removable Cushions | Yes | No |
| Camera bump friendly | Yes | No |
| Easy to open/work on | Yes | Not really |

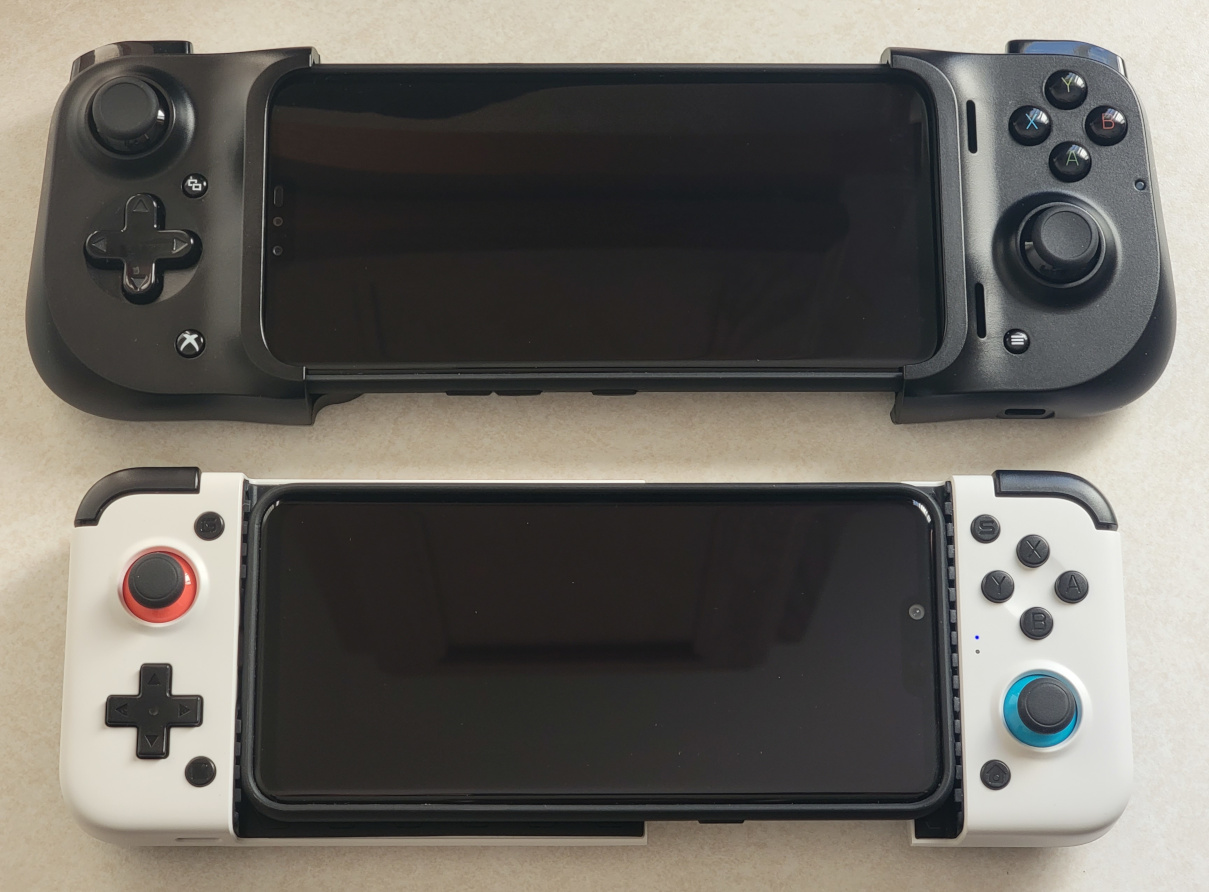
Razer Kishi + LG V50 (top) and GameSir X2 + LG G8 (bottom)
The Razer Kishi was built like an Xbox controller while the GameSir X2 emulates the Nintendo Switch Joy-Con. This isn’t just in looks. Both of these controllers also try to mimic the feel of the controllers they were inspired by. In my opinion, the GameSir X2 pulls this off a bit better with its tactile dome buttons and tactile switches that have a short and snappy feel. The Kishi buttons have a bit more travel, like Xbox controller buttons, but feel just a bit “mushier” than I’d expect. The buttons don’t stick or anything, but they definitely feel less snappy than those of the GameSir X2. I haven’t had button input problems with either of these controllers, so this one’s down to preference.
The D-pad is a similar story for the X2, with the domes providing excellent feedback when pressed. The Kishi however is a whole different story. It’s more mushy feeling than the face buttons, and is prone to accidental diagonals. I’ve opened my Kishi to see if anything can be done about this, and it’s really just down to poor quality materials for the membrane and a very loose pivot design, allowing the too-long-and-thin D-pad itself to move around too much on a small pivot point. This is by far the worst part of the Kishi, and could be a dealbreaker for some people, since retro games heavily rely on D-pad input. I certainly hope Razer can fix this in whatever the next iteration of their mobile controller may be.
If you primarily use the left analog stick for your directional input, then the Kishi may still be a viable option for you. Both the Kishi and X2 have excellent analog joysticks. The Kishi joysticks are a bit larger with a touch more tension, but both controllers have a very smooth feel when in use. The top of the X2 joysticks are notably and noticeably small, but feel surprisingly good to use even without the thumbstick covers that were packaged with the X2. I almost want to try out tiny thumbstick tops on full size Xbox and PlayStation controllers now.
One possible dealbreaker for the GameSir X2 is the layout. The Switch layout shouldn’t be much of an issue since emulators allow button remapping, but it’s still quite disorienting when trying to control the Android UI and having those buttons swapped. While GameSir keeps promising a way to remap the face buttons, it still hasn’t shown up. Currently the only way to remap the controls system-wide requires a rooted device and a Magisk module to patch the controller layout.
Neither is a perfect device, but a solid D-pad is critical for retro gaming, so I’m going with the GameSir X2 2021 Version. My G8 and V50 are rooted with the layout patch applied, so that makes the decision a bit easier. Rooting was a very complex process, so I suggest most people just remap the buttons until a better solution is available.
And as an added bonus - the GameSir X2 comes with a carry case that can hold the phone and the controller when not in use. Just put the phone below the controller when sliding under the strap and it all fits nicely inside.
SUGGESTED CONTROLLER: GameSir X2 2021/D-pad Version on Amazon
Just in Case
Not only will a cover/case provide device protection, it also helps the phone grip while mounted and fills up empty space in the phone area. In my opinion, it also gives it a more premium look with nice and protective matte finish bezel. Using a case with a telescopic USB-C controller can be tricky, as there isn’t much extra length on the USB-C connector to reach through a thick case. I’ve found these cases will provide a good level of protection for the LG phones while still allowing the GameSir X2 to work once everything is “snugged” into place:
You can use any case as long as it’s not too thick along the USB-C connector edge.
SUGGESTED CASE: Whatever works
Is It Worth?
With the base hardware selected, let’s figure out the damage (minus tax/shipping):
| Item | Price |
|---|---|
| LG V50 | $300 |
| GameSir X2 (2021) | $70 |
| Phone case | $15 |
| GRAND TOTAL | $385 |
That’s…actually not too bad for what we’re getting. Let’s compare it to a few other solutions and see if the quality-to-price proposition still holds up:

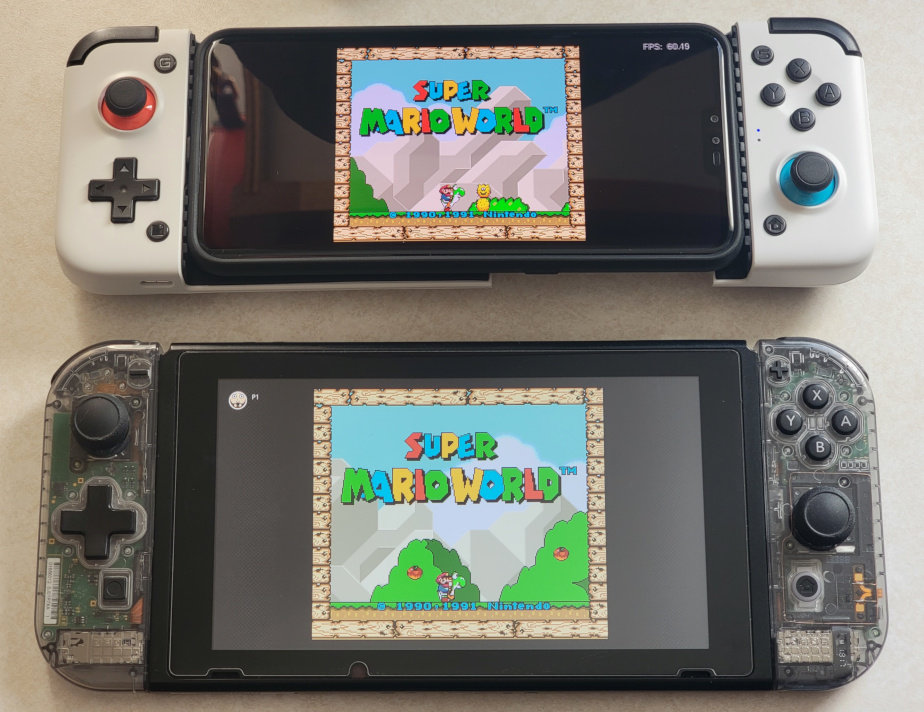
DIY vs. Switch comparison
| Feature | RG351V | GPD XD Plus | Hacked Switch | DIY QHD |
|---|---|---|---|---|
| Price | $100-130 | $230 | $250-400 | $385 |
| Storage | 64GB (included SD card) | 32GB | 32GB | 128GB |
| Native Resolution | 640 x 480 | 1280 x 720 | 1280 x 720 | 3120 x 1440 |
| Actual Screen Size | 3.5”, 4:3 ratio 229 PPI |
5”, 16:9 ratio 294 PPI |
6.2”, 16:9 ratio 237 PPI |
6.4”, 19.5:9 ratio 538 PPI |
| Max Screen Size, 4:3 | 3.5” | 4.1” | 5.1” | 4.5” |
| Max Screen Size, 16:9 | 2.4” | 5.0” | 6.2” | 5.5” |
| Display Technology | IPS | IPS | TN | P-OLED |
| Touchscreen | No | Yes | Yes | Yes |
| Speakers | Mono | Stereo | Stereo | Stereo |
| Estimated Runtime | 3-5 hours | up to 10 hours (advertised) | 2-4 hours | 3-8+ hours |
| Systems | ||||
| N64 | Yes | Yes | Yes (3x) | Yes (4x-6x) |
| Dreamcast | Partial | No | Yes (2x) | Yes (3x+) |
| PSP | Partial | Yes (1x-2x) | Yes (1x-3x) | Yes (4x-5x) |
| GameCube/Wii | No | Not really | Partial (alt OS) | Yes (1x-2x) |
| DS | No | Yes | Yes (1x-2x) | Yes (7x) |
| 3DS | No | No | Partial | Yes (3x-4x) |
NOTE: I don’t have all these devices available, but have filled in the details to the best of my knowledge. Max screen sizes were calculated using the actual screen size, ratio and PPI values.
The total cost rivals that of a hacked Nintendo Switch setup, which to this point was my holy grail for handheld emulation. Having played with this setup for a few weeks now, it’s absolutely insane the difference in visual quality between this and the Switch — plus I don’t have to risk a ban by good ‘ole Nintendo. Sure the screen is a bit smaller vertically, but the level of clarity, contrast and brightness from the V50’s QHD OLED is stunning. Plus, this setup is a bit lighter than the Switch making it more comfortable for me. Until we find out more info about Nintendo’s OLED-equipped Switch and how hackable it may be, this is absolutely my go-to setup for handheld retro gaming!
Part 2 will be a configuration guide for getting the most out of your new DIY QHD retro handheld. Until then, happy device hunting!